If imitation is the sincerest form of flattery, Andrea of Dream Carriers (www.dreamcarriers.com) should be quite flattered. I recently got a pre-owned Dream Carrier Original baby carrier, and it’s quickly become my favorite carrier. It helps that it’s the most beautiful Amy Butler print I’ve ever seen, but I digress. Anyway, point is, I’m on a “commercially” made baby carrier ban since DH doesn’t quite understand why anyone needs more than one, so it’s all DIY carriers for me, from here on out. I figured I would use the Dream Carrier body as my starting point for my half-buckle tai and make changes on future carriers from there.
Normally, I would post the measurements, but since I’m basing this off someone else’s work (for my own use) I don’t want to infringe on her intellectual property any more than I already am. :-) But you can certainly use my method to make whatever you want. One of these days, I will learn how to make patterns for real from one of the very good books out there, but right now, I’m just kind of developing a method that works for me.
I usually use newsprint for my patterns, but my entire stack got mistakenly thrown out with the trash over the weekend, so these are done on the back of last year’s Christmas wrapping paper. I’m finding it actually works quite well!
Below are pics of what I’ve completed so far: the pattern for the body and the carrier waistband. I used a half-inch seam allowance all the way around, except for the bottom where it will insert into the waistband, and the end of the waist strap where the webbing is going to be inserted. There I used a one-inch allowance.
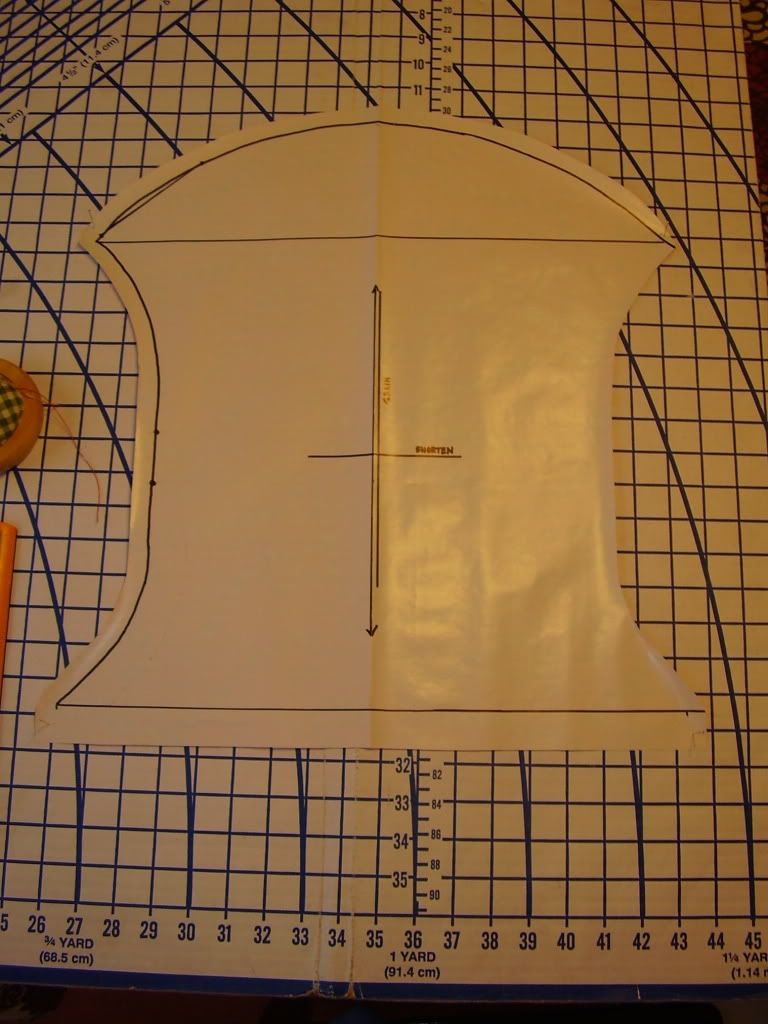
So this is how I went about drafting the pattern.
1) I started with how wide I want the body of the carrier at the bottom where it inserts into the waistband and drew a line across, then marked the center.
2) From the center, I measured up how high I wanted the body to extend and marked it.
3) Measured down the center line several inches to where the widest point will be and drew a line across (this is the line you see marked below the half circle.)
4) Marked the body of the carrier at its narrowest point and then made a straight vertical line for several inches. I lso marked a horizonal line at the exact center, so I can shorten or lengthen as I need to without distorting the other dimensions.
5) The tricky part was creating the curves, as I don’t have a flexible curve rule or dressmaker’s ruler on hand. I used the good old fashioned “string and pencil” method to create the curves. The trick is to find the place where the distance to the starting and ending point of your curve is equal. Think of a pie-shaped wedge. (Yeah, I know, that’s as clear as mud.) Let’s just leave it at this: I will be going down to JoAnn’s for a flexible curve before I make another pattern!
6) I did the curves for the top and bottom the same way.
7) You’ll notice that I have two dots on the left hand side: that’s where the webbing and buckles will be inserted if I use this pattern to make a full-buckle. I like to think ahead!
In order to make it symmetrical, I made all the measurements and markings on the left side, then folded in half along the center line and cut it out. I will most likely cut the fabric on the fold, but I wanted to leave it full size in case I had a compelling reason to cut in one layer instead. (Pattern-matching maybe?)
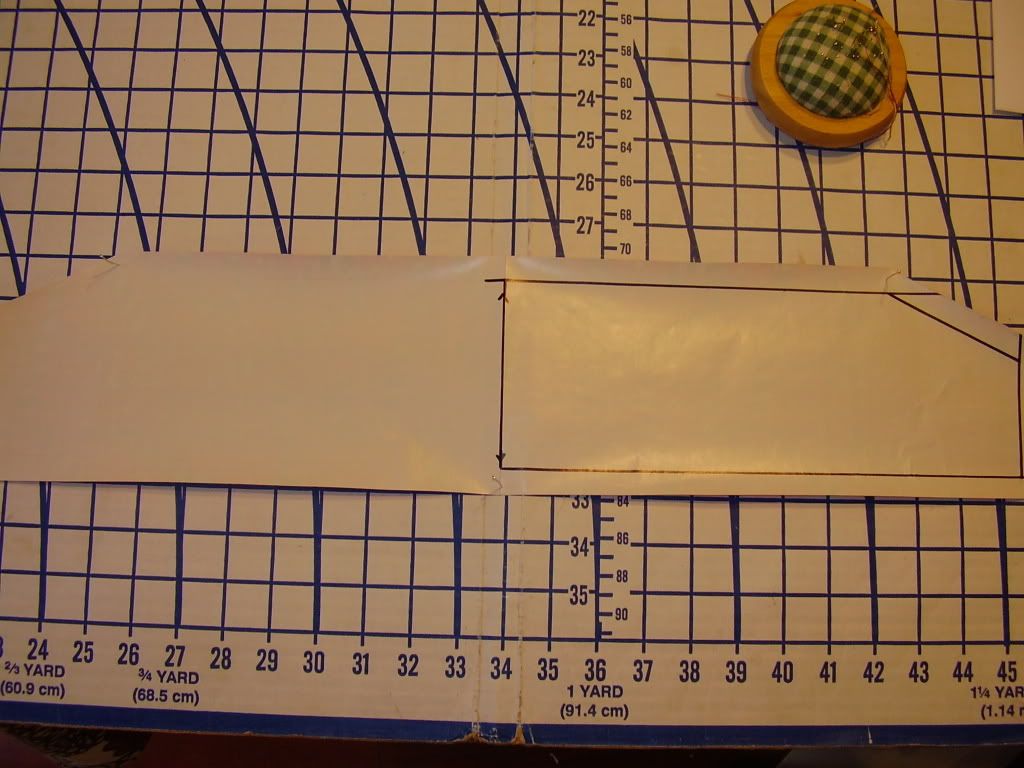
The waistband part is pretty self-explanatory. I liked the Dream Carrier’s angled strap where it goes into the buckle, so I copied that pretty closely.
The finished product is a bit more hourglass than the Dream Carrier, and slightly wider and taller, but it will have the same contoured shape. I have yet to decide whether I’m going to make up a muslin to check the pattern, or if I’m going to go straight to cutting the finished pattern. Luckily I will be using inexpensive quilter’s calico and twill that I already have on hand; I’ll perfect the pattern before I go on to cut my very lovely Michael Miller “Birds of Norway.” I’m also contemplating making a two-tone outer body, with that top half-circle becoming the same fabric as the straps and reverse side. It would have a bit of a Babyhawk or Kanga look then. (Though I will probably be making a version with a headrest like those as well… ah, so many projects, so little time.)
Stay tuned to see how the sewing comes together!
0 comments:
Post a Comment